Saturday 28 May 2011

Science Fair Projects


Understanding and Using the Scientific Method

The scientific method is the backbone of every science experiment, and understanding it is critical to the success of your science fair experiment.
Three different people can witness the same event, and each come up with a different account of how it occurred. Police and investigators know that this is true; so do parents and teachers. You've probably had some experience with this phenomenon, as well. Have you ever had two friends who attended the same event give you completely different reports of what happened?
These conflicting viewpoints occur because we all see the world differently. We all have beliefs, biases, and perceptions that cause us to view things the way we do.
While these differences are what make us each unique and assure that the world is an interesting place, they can make it difficult to determine what is really true and what isn't.
Scientists over the centuries found they faced the same problems when it came to sorting out the truth from nontruths. To solve the problem, they devised a methodical framework within which to work. This framework is called the scientific method, and it's extremely important to your science fair project.

The Scientific Method Made Easy

The scientific method is a tool that helps scientists—and the rest of us—solve problems and determine answers to questions in a logical format. It provides step-by-step, general directions to help us work through problems.
Basic Elements
The scientific method is a series of steps that serve as guidelines for scientific endeavors. It's a tool used to help solve problems and answer questions in an objective manner.
You probably use the scientific method in everyday life without even realizing it. Let's say that one night you feel like reading in bed, but your mom has already told you three times that it's late and you need to keep your light out and go to sleep.
Because you know you're not going to be able to sleep regardless of what your mom says, you reach under the bed for your handy flashlight and flip the switch to turn it on. Nothing happens.
Now you're faced with the problem of not being able to read because your flashlight doesn't work, and you're not happy about it. Having identified the problem, you think back to the last time your flashlight didn't work, and you remember that it was because of worn-out batteries.
You guess that worn-out batteries are the reason your flashlight isn't working now, so you get some new batteries from the drawer next to your bed and replace the ones in your flashlight. Presto! Your flashlight works.
Standard Procedure
There are two forms of the scientific method, but they both require the same objective reasoning and steps. The experimental method employs numerical data and graphs, while the descriptive method gathers information through visual observation and interviewing. The experimental method generally is used in physical sciences, and the descriptive method in zoology and anthropology.
Without realizing it, you've just worked through the steps of the scientific method to solve a problem.
For our purposes, there are five steps to the scientific method. They are …
  • Identify a problem.
  • Research the problem.
  • Formulate a hypothesis.
  • Conduct an experiment.
  • Reach a conclusion.
When your flashlight wouldn't turn on, you knew you had a problem. That took care of the first step. Your research (the second step) was conducted when you thought back to the last time your flashlight didn't work and remembered that you needed new batteries. You completed the third step by coming up with the hypothesis (an educated guess) that you needed new batteries this time, as well.
You conducted your experiment (the fourth step) when you replaced the batteries and turned the flashlight on. When the flashlight worked, you reached the conclusion that indeed, it had needed new batteries. You completed the fifth step of the scientific method and proved your hypothesis to be correct. You also got to finish that great book you were reading!
So you see, the scientific method is not mysterious or difficult, although you can use it to work through some difficult problems.

Don't Even Think About Not Using It

There's no question that you must use the scientific method when you do your science fair project. Nearly every science fair has rules that clearly state that the scientific method must be observed and followed. Not following the method's steps could cause you to arrive at incorrect results, and could make your entire project invalid.
Using the scientific method assures that you'll work objectively, not subjectively. That means that you won't bring to the project your personal, preconceived thoughts about what you think should or should not happen, or your own interpretations of your observations and data. The scientific method assures that you'll stick to “just the facts.” You'll employ objective reasoning instead of subjective reasoning. The difference, when it comes to science projects, is extremely significant.
What is objective reasoning, and how does it compare to its subjective cousin? Simply, objective reasoning is when you recognize that there's a problem, then use research and experimentation to solve it. Sort of like when your flashlight didn't work. You thought about (researched in your head) the problem, then experimented by replacing the batteries. And, ultimately, you solved the problem.
Had you reacted subjectively, however, you would have recognized the problem of the flashlight not working, but you may have come to an invalid conclusion based on emotions or some bias instead of figuring out that you needed new batteries. Maybe you would have assumed that the flashlight wasn't working because it was red, and you always hated the color red.
Suffice it to say that when you're working on a science fair project, or dealing with any scientific problem, the scientific method, which encourages objective reasoning, is the only way to go.

Whoever Thought of the Scientific Method, Anyway?

The scientific method probably is the cumulative result of hundreds of years of scientific pondering and people working to make sense out of what goes on around us.
Scientific Surprise
Francesco Redi was a man of many talents. In addition to his scientific work, he worked as a doctor, and was also a poet and writer. As a doctor, he stressed the importance of a balanced diet.
A scientist often credited with being the first to employ the scientific method—although he wouldn't have called it that—is Francesco Redi, an Italian physician who lived from 1626 until 1697.
Redi's work to disprove spontaneous generation is often credited as the first modern experiment, and was conducted within the parameters of what we now call the scientific method. Basically, Redi disagreed with the then-popular notion that some species appeared spontaneously in nonliving matter.
As odd as it seems to us, people believed for hundreds of years that certain species could be grown from nonliving materials. Some people, for example, thought that if you put worn, sweaty underwear in an open jar with some husks of wheat and let it sit for a few weeks, the sweat from the undies would penetrate the husks of wheat and turn the wheat kernels into (are you ready?) mice. Weird, huh?
Redi's work, however, didn't involve underwear and mice, but rotting meat and maggots. It was widely believed in those days that maggots appeared spontaneously from rotting meat. Redi, however was convinced from his research, which consisted primarily of observing activity surrounding rotting meat, that the maggots resulted from the eggs that visiting flies deposited on the meat.
He hypothesized that the maggots came from the eggs of flies, and set out to prove that he was right. Redi set up an experiment in which some meat was left uncovered, some was partially covered, and some was sealed so that nothing could get to it.
As you probably guessed, no maggots appeared on the sealed meat, because no flies could reach it. Redi's hypothesis was shown to be correct, and the roots for the scientific method had taken hold.

Stating the Problem

The first step when using the scientific method is to state the problem you'll be attempting to solve. This step is sometimes referred to as “stating your purpose.” You're identifying the purpose of the project, which is to solve a problem or answer a particular question.
In a science fair project, you deliberately identify and state the problem you're attempting to solve. In everyday life, you probably do the same thing in a more informal way. Did you ever ask yourself (or someone else) why your neighbor's grass is really green, and yours is sort of brown with lots of weeds in it?
Standard Procedure
Try to be aware of how you may identify problems as they occur in everyday life. Chances are that you'll find yourself using a simpler version of the scientific method to solve problems and answer questions on a daily basis.
Or why you got an 88 percent in the last math test, and your best friend only got a 74 percent? Every time you ask a question of this sort, you're stating a problem. You can probably go ahead and solve these types of problems by doing some informal research, making a guess, and checking to see if you're right.
You may learn, for instance, that your neighbor has been fertilizing his lawn, and your best friend forgot to take his math book home the night before the test.
When you state your problem or question, be sure not to make it so broad that it becomes unmanageable. Try to focus in and make your problem specific. This will help you to find a starting point in solving it.
For instance, stating your problem as “In what conditions do plants grow best?” is so broad and general that it would be almost impossible to know how to begin working through a project.
But, if you ask, “Do bean plants grow better in direct sunlight, indirect sunlight, or shade?” you've narrowed down your problem to address only one type of plant, and one factor affecting its growth.
Also, be sure that your problem is one that can be solved through experimentation. Solving the bean plant problem stated above can easily be accomplished through a controlled experiment. A controlled experiment is when you test a variable against a control.

Researching Your Topic

Once you've stated your problem, you'll probably need to do a bit of research before you formulate your hypothesis.
At this point, you'll be refining your research to specifically address the problem you've stated. This will allow you to put forth an intelligent and well thought out hypothesis, which is simply an educated guess about the results of your project.
Remember to document your research, and use a variety of sources. Don't forget that your previous experiences and knowledge you already have can be valuable additions to your research.

Coming Up with a Hypothesis

Basic Elements
hypothesis is an educated guess about the outcome of your experiment, based on knowledge that you have and research you've conducted.

The third step of the scientific method is formulating a hypothesis. All this means is that you'll need to come up with a statement concerning the predicted results of your experiment. It's what you think will happen, based on the research you've done and your knowledge. A hypothesis doesn't include why you think you'll get certain results, just what you think they will be.
The more you know about your problem, the better equipped you'll be to come up with a logical hypothesis.

Giving It Your Best Guess

Your hypothesis should be clearly and simply stated, and should be in statement form—not a question. If you're guessing about the growth of the bean plants, for instance, the following statement is an example of a clear, concise hypothesis:
  • Bean plants will grow better in direct sunlight than in indirect sunlight or shade.
Because it's understood that a hypothesis is an educated guess, you don't need to say that you're guessing. You needn't say, for example, “I think that bean plants will grow better in direct sunlight than in indirect sunlight or shade.”

Remembering That It's Only a Guess

So what happens if you state your hypothesis, only to find out after the experiment that it's wrong? Nothing.
Explosion Ahead
If your hypothesis turns out to be incorrect, resist the temptation to change it. This defeats the purpose of using the scientific method. An incorrect hypothesis will not affect the quality of your project.
Guessing incorrectly the results of your experiment doesn't make the experiment wrong, or any less valuable than if your hypothesis turned out to be correct. Your hypothesis isn't necessarily the answer to your problem. It's simply a statement of what you think will happen.

Testing Your Hypothesis

The experiment that you conduct will be to test your hypothesis. Your experiment will be designed around your hypothesis, and will either prove or disprove it.
It will be important to conduct your experiment with your hypothesis in mind. However, it's imperative that you don't engineer your experiment to prove that your hypothesis is correct. You can't for instance, add Miracle-Gro to the direct-sunlight bean plants to assure that they'll grow better than the other plants. If you do, you'll be helping along your hypothesis, but invalidating the results of your experiment.

Gathering the Materials You'll Need

Explosion Ahead
Using materials you already have is convenient and economical, but just be sure that it's also safe. If your experiment calls for pouring boiling water into a glass beaker, for instance, don't substitute a lightweight, plastic cup, just because you happen to have one in your home.
As with any project, it's important that you have all the materials you'll need to conduct it properly. Just as you wouldn't begin making a recipe without first making sure you have all the ingredients, you shouldn't begin your experiment without making sure you have what you need.
Of particular importance will be having the proper tools for measuring. Many projects require careful, accurate measuring. Most tools for measuring aren't fancy or expensive, but they're essential for conducting an experiment properly. Important measuring tools include tape measures, metric rulers or meter sticks, measuring spoons and cups, thermometers, and clocks or watches with second hands.
book cover

Advanced-Level Science Projects Chemistry


Which Metal Corrodes the Fastest?

Did you ever have a shiny new bike that over time got to look not so shiny and new anymore? Or some beach chairs that got left outside over the winter and by spring looked like they were ready for the trash heap?
If so, chances are that the culprit was rust. Mailboxes, swing sets, lamps, cars, railings, and just about anything else made from metal are subject to the perils of rusting—a deteriorating metal condition.
You've undoubtedly had some experience with rust—or at least have seen it on a car or other object. Rust is so common that its color also is called rust, as in rust-colored leaves, or rusty-brown hair.
In this section, you'll learn a lot more about rust and how it occurs. And you'll attempt to find out which metals rust the fastest, by exposing them to water and to salt water.

So What Seems to Be the Problem?

Rust occurs when metals containing iron react with the oxygen in the air or in water and form a compound called iron(III) oxide (ferric oxide). This compound contains water molecules, so we call it a hydrated compound.
Both oxygen gas and water must be present for the iron to rust. Chemically and very simply speaking, iron atoms lose a few electrons to oxygen atoms. This process by which electrons are removed from atoms is called oxidation. When oxidation occurs, it produces a chemical reaction that creates iron(III) oxide—or rust.
Basic Elements
Oxidation is the process by which electrons are removed from atoms. It also can refer to a reaction of an object exposed to oxygen.
Rust is a type of corrosion. But it's not the only type. Other forms of corrosion include:
  • Tarnish found on silver teapots, trays, and jewelry
  • Copper carbonate, or patina, the corrosion that causes copper to turn green
  • Discolored spots that appear on brass
  • Aluminum oxide, which forms on aluminum
  • Chromium oxide, which forms on the outside layer of stainless steel
On some metals, corrosion actually serves as a type of protection. Aluminum oxide, copper carbonate and chromium oxide, for instance, act as protective coatings for the underlying metals.
Rust that forms on iron, however, cannot protect the iron from further corrosion because it's too porous.
The problem you'll be attempting to solve in this science fair project is which metals corrode the fastest, and under which conditions. You'll test five metals—silver, steel, zinc, copper, and aluminum—to see which corrodes fastest in water and in salt water.
When you've finished, you'll have a better understanding of corrosion, the process of oxidation, and the properties of different metals.
Scientific Surprise
Corrosion causes tremendous damage to buildings, cars, bridges, and ships. Finding a method to halt corrosion is a high priority for experts working in the metal industry.
The title of this section, “Which Metal Corrodes the Fastest?” would be a suitable title for your science fair project. Other possible titles include:
  • Which Metal Holds Up Best in a Corrosive Environment?
  • Understanding How Corrosion Affects Common Metals
Or, you can think of a name for your project on your own. Let's take a few minutes now to consider why this project is valuable.

What's the Point?

Why should you care which of the five metals you'll be testing corrodes the quickest? Why should you care about metals at all, for that matter?
Metals have thousands of uses that affect our everyday lives, most of which we take for granted. Copper, for instance, is pliable and a good conductor of electricity. For those reasons, it's used to make the wire inside of electrical cables. Without electrical cables we'd have no electricity in our homes—no light, TV, or video games.
Aluminum is extremely strong and can be fashioned into thin sheets, making it vital for aircraft production. Think about that the next time you climb onto an airplane. Metals are used to make the utensils we eat with, the coins we use to buy what we want, and the cars we drive.
Obviously, metals that are used to build aircraft, cars, and electrical wiring had to be extensively tested to make sure they were suitable for use.
You can be sure that there was far-reaching research and experimentation before the first copper wire was put to use in an electrical cable. Metallurgists—experts on metals—are constantly looking for new uses of metals in many fields, including medical, military, and aeronautics.
Metals—and how they're used—are extremely important. Once you know how different metals hold up to corrosion, you'll be able to better understand why they have particular roles, and why they're important. In addition, you'll be able to give Mom and Dad some pointers the next time they're shopping for a new outdoor lamp or metal toy for your little brother.
Basic Elements
metallurgist, sometimes called a metallurgical engineer, researches, controls, and develops processes used in extracting metals from their ores in order to refine them. Experts in the area of metals, metallurgists also study the effects of combining metals with other materials, such as polymers and ceramics.
By experimenting with five different types of metal wire, you'll be able to see which corrodes the fastest, and which ones hold up best under certain circumstances. You'll test each wire in both distilled water and salt water. Again, the types of metal you'll be testing are:
  • Silver
  • Steel
  • Zinc
  • Copper
  • Aluminum
Your control group will be 10 pieces of wire—two each of the metals listed above. The variables are the distilled water and the salt water in which the metal wires will be immersed. Using the scientific method, you'll learn which metal begins to corrode first, and which holds up the best.

What Do You Think Will Happen?

Think about what you may already know about different kinds of metals and how they react when exposed to rain, or air or water that contains a lot of salt. This will help you to formulate a hypothesis based within the context of knowledge you already possess.
Go back to the bicycle mentioned in the first sentence of this section. Under what type of circumstances did your bike rust? When it was stored in the dry garage? Or when you left it lying out in the yard for three days during a steady rain?
Why do you suppose that cold-weather drivers are advised to rinse off their cars every now and then during the winter season when road salts are being used? Have you ever noticed or heard people talk about problems with corrosion near the beach, where salt water is prevalent?
Do you already know, perhaps, which metals are most resistant to corrosion? If so, the experiment you'll do will support and affirm your knowledge. If you don't, try to use common sense and any information you may have about this topic to come up with your best guess—or hypothesis.

Materials You'll Need for This Project

The experiment you'll be doing will require only a short amount of time to set up, but you'll need to make observations over a 10-day period.
It's going to be important to write down exactly what you see happening to each metal each day. Remember that your measurements will be qualitative, not quantitative. For that reason, the more data you present concerning your experiment, the more reliable your results will be.
You'll need some materials for this experiment that probably aren't lying around your house. You should be able to find everything you need, however, at your local hardware or home supply store. You will need:
  • 12 inches (30.5 cm) of silver wire
  • 12 inches (30.5 cm) of steel wire
  • 12 inches (30.5 cm) of zinc wire
  • 12 inches (30.5 cm) of copper wire
  • 12 inches (30.5 cm) of aluminum wire
  • Small pair of wire cutters (or ask the person at the store who cuts the wires for you to cut each 12-inch piece in half)
  • 10 clear drinking glasses (preferably identical), or 10 test tubes and a test tube rack
  • A pen or fine-point marker
  • Small pieces of paper or labels for the glasses or test tubes
  • 10 pencils (they don't need to be sharpened)
  • Transparent or masking tape
  • Liquid measuring cup
  • A tablespoon measure
  • A funnel
  • Distilled water (available in gallon jugs in most grocery stores)
  • Table salt
If you can get test tubes and a rack, you'll probably find them easier to use than glasses. If you have to use glasses, however, that's fine. You can use plastic or glass cups; just make sure that they're clear so you're able to easily observe what's happening to the wires in them.

Conducting Your Experiment

Make sure that you have all your materials ready before you begin the experiment. Be sure to find an area large enough to accommodate the glasses or test tubes, where they will be undisturbed for the duration of your experiment.
Follow these steps:
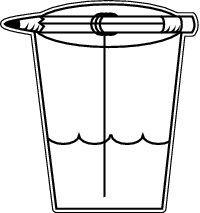
Wires of different materials are suspended in distilled water and salt water.
  1. If the five wires aren't already cut, cut them into 6-inch lengths.
  2. Using the pen or marker, mark ten labels or small pieces of paper as follows:
    • water + silver
    • salt water + silver
    • water + steel
    • salt water + steel
    • water + zinc
    • salt water + zinc
    • water + copper
    • salt water + copper
    • water + aluminum
    • salt water + aluminum
  3. Set the glasses or test tubes on a table or counter where you'll be able to easily observe them.
  4. Stick a marked label, or tape a piece of marked paper, on each glass or test tube. Face all labels front so you can easily see them.
  5. Using the measuring cup and funnel, fill five glasses or test tubes with distilled water.
  6. Mix 8 ounces (240 ml) of water with 1 tablespoon of salt. Stir until the salt is completely dissolved.
  7. Fill the other five glasses or test tubes with the salt water solution, mixing more water and salt as needed.
  8. Wrap one end of each piece of wire around a pencil, so that when the pencil rests across the top of the glass, the wire hangs to the bottom.
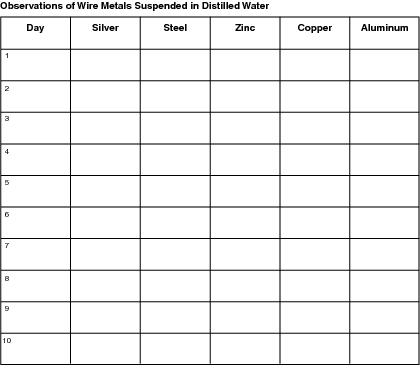
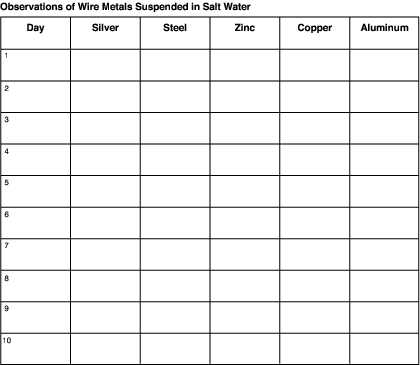
  9. Observe each wire at least once a day for 10 days. Use the charts found in the following sections, or make your own charts.
Remember that the more clear and accurate your observations are, the better you'll be able to draw conclusions from your experiment.

Keeping Track of Your Experiment

Explosion Ahead
Don't be tempted to cut short your observation time, even if one or more of the wires appears corroded before the 10-day period has ended. Decreasing the experiment time will jeopardize the reliability and validity of your results.
Use the charts on the following section, or make your own, similar charts to keep track of what you observe during the course of your experiment.
Be sure to not mix up the glasses. They'll all look very similar, so be sure that the labels remain intact and you can see them clearly.

Putting It All Together

Some observations you'll want to consider are how the changes to the metal wires immersed in the distilled water compared to the wires in the salt water. Which metals had the most rust? Was the formation of the rust on any of the wires concentrated on one particular area on the wire? Or was the corrosion distributed evenly along the immersed wire? Based on your data, which metal would you recommend for the manufacture of bikes, beach chairs, and swing sets—not to mention aircraft and medical equipment?
Once you've recorded your results, you can draw a conclusion and identify the answer to the problem you stated at the beginning of your project.

Further Investigation

Standard Procedure
A good idea when presenting your project would be to display any corroded wires next to a new piece of the same type of wire. If you want to do this, remember to buy an extra 6 inches of each type of wire so that you'll have a new piece at the end of the experiment.
If you enjoyed this project and would like to take it a step or two further, you could try one of the following ideas:
  • Place the metal wires in different liquids and see what happens. You could try vinegar, club soda, coffee, tea, soy sauce, or any other nonhazardous substance.
  • Try using different metals, such as brass, titanium, or zinc.
  • Test to see whether different conditions lead to different results. If you place some of the glasses in a cold spot, for instance, and others where it is very warm, do you get different results between the two groups?
Use your imagination to come up with other ways to vary the project and delve a bit further into this issue. Just be sure to keep good, accurate notes.
book cover

Intermediate-Level Science Projects


Chemistry

Are All Pennies Created Equal?

The penny, which has been around in the United States in one form or another since 1787, was the first currency of any type authorized by the newly formed America. Benjamin Franklin, who is well known for his famous quotation regarding the penny (“A penny saved is a penny earned”), suggested the first design for the new coin.
The original penny was 100 percent copper and was known as the Fugio cent. It was made at a privately owned mint. That particular model of penny lasted until 1859, when the Indian Cent was introduced. If you've never seen an Indian penny, be sure to check your change. They still show up now and then, and they're very cool. The Lincoln penny—our current model—first appeared in 1909 to mark the 100-year anniversary of Abe's birth.
The Lincoln penny has undergone numerous design changes as well as changes in composition. During World War II the composition of the penny was changed from 95 percent copper and 5 percent zinc and tin to zinc-coated steel because copper was needed for war efforts.
The problem you'll try to solve in this section, however, doesn't concern the design of pennies or what they will buy. Instead, you'll explore the chemical composition of pennies minted during the past 30 or 35 years, trying to figure out if and when it has changed. Let's get started.

So What Seems to Be the Problem?

The problem, or question you'll attempt to answer during the course of this project, is whether the chemical composition of the penny has changed over the decades since 1970. In other words, are different materials used to make newer pennies than those that were used to make older pennies?
Pennies minted before 1970 look pretty much the same as those minted after. They're probably dirtier, but you can't tell by looking at them whether they're made of the same materials.
By the time you finish the project, however, you'll know whether the composition of those pennies you carry around in your purse or pockets has changed during the past 30 or 35 years.
If you want to give a name to your project, you could use the section title, “Are All Pennies Created Equal?” A few other suggestions for project titles are:
Scientific Surprise
The penny is the most circulated American coin. More than 300 billion one-cent coins have been produced since they first showed up in 1787.
  • How Have Our Pennies Changed?
  • A Penny Is a Penny—or Is It?
  • Exploring the Chemical Composition of a Penny
Now that you've identified the problem you'll be attempting to solve, it's time to consider the purpose of this project.

What's the Point?

The point of this project is to determine, using the scientific method, whether pennies made before 1970 (those will be your control group) are heavier or lighter than those made in each decade after that date (the groups of pennies from each decade since the 1970s will be your variable groups). You also should be able to get an idea of specific years in which the weight of the penny was changed.
So why are we suggesting this topic for a science fair project? Who really cares what materials are used to make one-cent coins, anyway? It doesn't change the way they look or what you can buy with them, right?
Basic Elements
The chemical composition of an object is the materials of which it is made. The mass is its weight, and the density is the mass per unit volume, which is usually measured in grams per milliliter. The density of water, for instance, happens to be one gram per milliliter.

Although there may be no real practical need to know the composition of our pennies, it's interesting to think about how they may have been changed and why. If you do determine that pennies made in the decades since 1970 are different from those minted before that, maybe you'll want to do some additional research and try to find out why. Is it because of a copper shortage, like it was during World War II? Or maybe there's a different reason.
You can't tell by looking at pennies whether they're made of exactly the same materials. The older ones are the same size as the newer ones, so they look the same. The only way to establish whether the chemical composition of the different groups of pennies is the same or different is to determine the mass (weight) of each group.
Different metals have different densities. A penny containing more of a certain metal than another penny will have a different mass, because its density is different.
If the average mass of your control group (those pennies minted before 1970) is different from that of any of the variable groups, you'll know that the pennies are not made of the same amounts of the same materials.

What Do You Think Will Happen?

Take a few minutes to think about the facts stated below, and then try to work out your hypothesis.
Scientific Surprise
The mass of one cubic centimeter of copper is 8.96 grams, while the mass of the same amount of zinc is 7.13 grams.

  • A penny is made of copper and zinc.
  • Copper is heavier than zinc.
  • The cost of copper has been on the rise during the past couple of decades.
  • It's less expensive to mint a penny that contains an increased amount of zinc.
Once you've considered these facts, you should be able to make an educated guess concerning the results of your experiment. But you won't know for sure until the experiment is completed.

Materials You'll Need for This Project

There are very few materials needed for this experiment. The only things you'll need are listed below.
  • An electronic or digital balance scale or other tool to measure mass.
  • Enough pennies to produce 10 of each group. You'll need 10 pennies minted before 1970, 10 minted from 1970 through 1979, 10 minted between 1980 and 1989, 10 minted between 1990 and 1999, and 10 that have been minted since 2000.
Explosion Ahead
Don't be tempted to use your bathroom scale for this experiment. The weight difference between your penny groups may be very, very small, and your bathroom scale probably isn't sensitive enough to pick up the difference.
A traditional balance scale is a scale that has two pans that hang from opposite ends of an overhead arm. If objects placed in the different pans are of different weights, the pan holding the heavier object will be lower than the pan containing the lighter object. There are many electronic versions of balance scales available. You can purchase one in your local office supply store.
If you happen to have a balance scale in your home or can borrow one, that's great. If you don't have one, ask your science teacher if the school has one you can use. If you can't take it home with you, you can easily carry your pennies along to school and weigh them there.
If you don't have a piggy bank you can break into and rob, you can easily get pennies from your local bank. A roll of pennies contains 50 coins, so you'll need to take a few dollars along to exchange for five or six rolls of pennies.
Ideally, you'll have a group of 10 pennies all minted before 1970, and one penny from each year between 1970 and 2000.
You'll use an electronic balance scale to measure the weight of pennies from varying years.
It's probably not a bad idea to get an extra roll or two, because you want to assure that you'll have enough pennies from both the control group and the variable groups to be able to conduct your experiment.

Conducting Your Experiment

You've identified the problem you're attempting to solve, come up with a hypothesis, and gathered the materials you need; now you're ready to begin your experiment.
The experiment, as you know, is the heart of a science fair project, so be sure to work carefully and in an organized manner. Just follow these steps, and remember to carefully note your observations. It would be a good idea to fill in the charts illustrated in the next section, “Keeping Track of Your Experiment,” as you proceed. You'll need to make a chart for each group of pennies to be able to record all your data. You'll end up with four charts.
Follow these steps:
Scientific Surprise
The average mass of one penny equals the total mass of 10 pennies, divided by 10.
  1. Look through the pennies you have and find 10 that were minted before 1970. Do not include those made in that year.
  2. List the date of each of the 10 pennies in chronological order on a data chart similar to the first one in the next section. Remember that the dates on this chart are just samples. You'll need to fill in the dates from the pennies you're using.
  3. Using your balance scale, determine the mass of each penny in grams to the hundredths place, starting with the oldest and working up to the newest.
  4. Calculate the average mass of one penny and record the mass on your data chart.
  5. Select 10 pennies from your pile that were minted between 1970 and 1979.
  6. Repeat steps 2 through 4, using those pennies.
  7. Gather 10 pennies minted between 1980 and 1989.
  8. Repeat steps 2 through 4, using those pennies.
  9. Collect from your pile 10 pennies made between 1990 and 1999.
  10. Repeat steps 2 through 4, using those pennies.
Once you've determined the average mass of each group of pennies, you'll be ready to begin analyzing your data.

Keeping Track of Your Experiment

To keep track of your findings, use these charts or similar ones you make yourself. Remember that you'll have four charts when you're finished.
Date of PennyMass in Grams
1. 1955______
2. 1956______
3. 1960______
4. 1961______
5. 1962______
6. 1964______
7. 1965______
8. 1966______
9. 1967______
10. 1969______
average mass in grams:______
Date of PennyMass in Grams
1. 1970______
2. 1971______
3. 1972______
4. 1973______
5. 1974______
6. 1975______
7. 1976______
8. 1977______
9. 1978______
10. 1979______
average mass in grams:______
Date of PennyMass in Grams
1. 1980______
2. 1981______
3. 1982______
4. 1983______
5. 1984______
6. 1985______
7. 1986______
8. 1987______
9. 1988______
10. 1989______
average mass in grams:______
Date of PennyMass in Grams
1. 1990______
2. 1991______
3. 1992______
4. 1993______
5. 1994______
6. 1995______
7. 1996______
8. 1997______
9. 1998______
10. 1999______
average mass in grams:______
When you've finished your experiment and have each of the four data charts filled out, you'll need to look at each chart and begin making some comparisons.

Putting It All Together

Standard Procedure
The cost of copper increased dramatically during the 1980s, forcing the government to change the proportion of copper to zinc found in pennies.
The bottom line, of course, is whether the pennies minted pre-1970 are heavier than those in any other group. If they are, what conclusions can you draw? Remember those facts presented a few pages back in the section about reaching a hypothesis? Think about those facts—they'll help you to draw some interesting conclusions.
Also note any other interesting observations. For example:
  • Did the weight of the pennies decrease steadily from one decade to the next?
  • Is there one decade, or perhaps even one year, in which the mass changed significantly?
  • Are the newest pennies the lightest ones?
  • What's the difference of the average mass in grams between the heaviest group and the lightest group?
  • Are there any kinds of patterns or disruptions to patterns?
Make all the observations you can, and use them to help you formulate a conclusion.
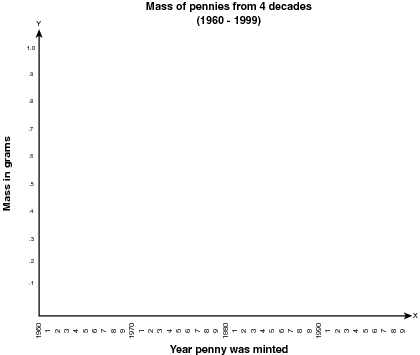
Use this line graph to record the date and weight of each penny.

You could represent the data on your charts on one line graph. On the horizontal line (called the X axis), you would write the year of each penny you weighed, beginning with the earliest year.
On the vertical line (called the Y axis), you would list the range of masses from lightest to heaviest.
Once you've graphed your information and studied your conclusions, you can come up with a decisive statement concerning the chemical composition of the penny. Are pennies made after 1970 and throughout the following decades lighter than those made prior to that year? Was your hypothesis correct?

Further Investigation

As suggested earlier in this section, if you've determined that the weight of pennies has, indeed, been changing over the decades, maybe you'll want to take a closer look and try to figure out why.
The obvious answer seems to be that pennies are lighter than they used to be because they contain less copper and more zinc in an effort to offset the rising cost of copper. But, according to figures from AME Mineral Economics, a global firm of independent economists in the metal and mineral industries, the cost of copper actually declined in 2001. Does this mean the government might start replacing the zinc found in pennies with copper?
Standard Procedure
You can check out what AME Mineral Economics has to say about the cost of copper and other minerals by going to its website atwww.ame.com. You'll get a menu from which you can select the mineral you're interested in.
Another way to go a step further on this project is to repeat the experiment using 10 pennies from each year of the particular decade in which you noticed a significant change in the average mass of the pennies, compared to the control group. You would, for instance, determine the mass of 10 pennies dated every year between 1980 and 1990, meaning that you'll need 100 pennies.
By doing so, you'd be able to tell if the mass decreased steadily each year, or if it was steady for several years and then took a big drop. You may notice some interesting patterns and be able to pinpoint a particular year in which the chemical composition changed significantly.

Enews And Updates